 Bellingham
 New-Construction Windows for Columbia Homes
Columbia sits close enough to Bellingham Bay that salt-laden air, wind-driven rain, and long stretches of gray, damp weather are just part of owning a home here. When you're building new or doing a full remodel down to the studs, the window installation method you choose has more long-term consequence than almost any other decision in the build. New-construction windows, installed correctly with a proper flashing and drainage plan, are the best defense a Columbia home has against the moisture that eventually finds its way into every wall in Whatcom County.
This page covers what new-construction windows are, why they're the right call for ground-up builds and gut remodels in this neighborhood, and what a correct installation actually involves — not just the window itself, but everything around it.
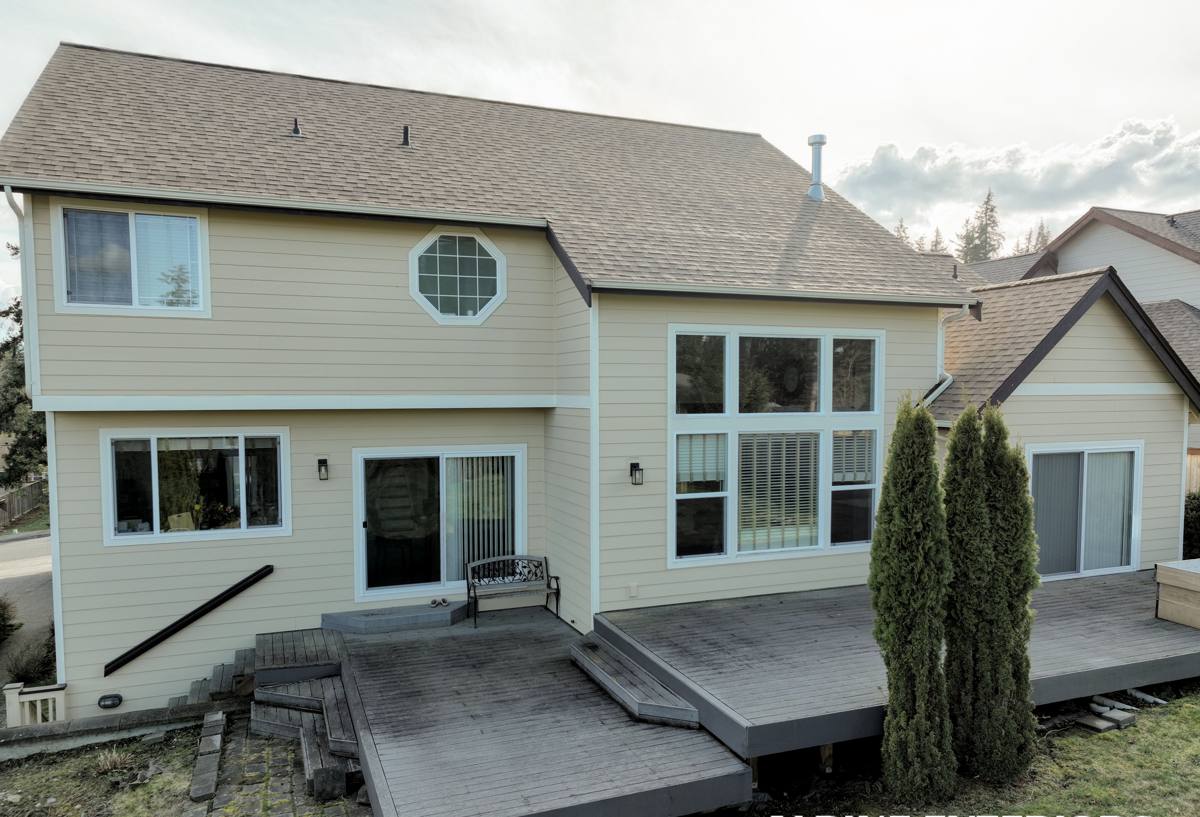
Why Columbia's Climate Changes the Calculus
Columbia's location near the water means homes here take on a specific combination of stresses that inland Whatcom County properties don't deal with as heavily:
- Salt air corrosion — proximity to Bellingham Bay accelerates the breakdown of unprotected fasteners, low-grade flashing metal, and cheap window hardware over time.
- Driving rain — wind off the water doesn't just fall straight down, it pushes rain sideways into window openings, testing every seal and flashing lap.
- Long moss and mildew season — Whatcom County's wet season stretches for months, keeping wall assemblies damp longer than in drier climates and giving any trapped moisture more time to do damage before it ever dries out.
None of this is exotic — it's the same weather pattern that shapes siding, roofing, and drainage decisions across Bellingham. But windows are the single largest concentration of penetrations in a wall, and a mistake at one opening can lead to rot that isn't visible from inside the house for years.
What "New-Construction" Windows Actually Means
New-construction windows are built with a nailing fin (also called a nail flange) around the perimeter of the frame. That fin gets integrated directly into the wall's water-resistive barrier (WRB) and flashing system before siding goes on. This is different from a retrofit or "insert" window, which is designed to slide into an existing frame without disturbing the surrounding wall — a common approach for replacement projects where the siding is staying put.
For new builds and full remodels where the wall is open to the sheathing, new-construction windows are almost always the better choice, because they let us build a complete, layered drainage plane around every opening instead of working around what's already there.
New-Construction vs. Retrofit — When Each Makes Sense
| Factor | New-Construction Window | Retrofit/Insert Window |
|---|---|---|
| Best used when | Wall is open to sheathing (new build, gut remodel, siding replacement) | Existing siding stays in place, frame is sound |
| Flashing integration | Full flashing system tied into WRB and siding | Relies on existing wall flashing, more limited access |
| Moisture management | Best possible — built from the sheathing out | Good, but constrained by what's already there |
| Disruption | Higher — requires open wall | Lower — minimal disturbance to interior/exterior finishes |
| Long-term fit for Columbia's climate | Ideal for salt air and driving rain exposure | Acceptable when the existing assembly is already sound |
What a Correct Installation Involves
The window unit itself is only one piece. In our experience, most window failures in this region trace back to the flashing and sequencing, not the window brand. A correct new-construction installation follows a strict order of operations so that water is always directed outward and downward, never trapped behind the siding.
The Layered Drainage Approach
- Rough opening prep — the sheathing opening is checked for square, level, and proper size before anything else happens.
- Sill pan flashing — a sloped, corner-sealed pan goes at the bottom of the opening first, so any water that gets past the window has a built-in path back out, not into the framing.
- Window-resistive barrier integration — the WRB (housewrap or equivalent) is cut, folded, and lapped in the correct shingle-style order around the opening.
- Setting the window — the unit is set into the sill pan, shimmed level and plumb, and fastened through the nailing fin per the manufacturer's schedule.
- Jamb and head flashing — side flashing goes on next, then head flashing last, always overlapping the layer below it — never the reverse.
- Sealant at the right layers only — sealant supplements the flashing, it doesn't replace it. Sealing every seam without a drainage path just traps water behind the window instead of keeping it out.
- Interior air sealing — a separate, interior-side air seal at the rough opening reduces drafts and condensation risk without interfering with the exterior drainage plane.
Skip or reverse any one of these steps and the window can look perfect from the curb while quietly feeding water into the wall assembly. This is the kind of defect that doesn't show up on a walkthrough — it shows up three or five years later as soft trim, staining, or a musty smell that traces back to a header that's been wet the whole time.
Choosing Window Materials and Glazing for This Location
Columbia's mix of salt air, wind, and near-constant winter dampness makes material choice worth real thought, not just a style preference.
Frame Materials
Vinyl, fiberglass, and aluminum-clad wood are the common options in this market. Vinyl handles moisture well and needs the least upkeep, which matters given how much of the year this area stays wet. Fiberglass holds up to temperature swings and coastal air with minimal maintenance and tends to hold paint or finish longer than vinyl if a custom color is wanted. Aluminum-clad wood gives a traditional interior look but needs attention to the cladding seams over time, especially with salt air in the mix — any break in that cladding is an entry point for moisture into the wood underneath.
Glazing and Performance
Double-pane, low-E glass with argon fill is the practical baseline for this climate — it manages heat loss through our long heating season and cuts condensation risk on interior glass during cold, damp stretches. Triple-pane is worth discussing for north- or water-facing walls that take the brunt of the wind, but it adds cost and weight that isn't always necessary on every elevation of a house.
Hardware and Fasteners
Given the salt air exposure this close to the bay, we pay attention to fastener and hardware corrosion resistance — stainless or coated fasteners at the flashing and cladding layers hold up considerably longer near the water than standard galvanized options.
Sizing, Placement, and Structural Considerations
New construction and full remodels give us the freedom to plan window placement around light, view, and wall bracing needs — but every large opening removes shear strength from a wall, and Whatcom County's wind exposure means that matters more here than it might inland. We coordinate window sizing and placement with the structural plan so headers, king studs, and shear panels are sized correctly for the openings you want, rather than working backward from a window schedule that doesn't match the framing.
Egress requirements for bedrooms, tempered glass near doors and low sills, and energy code minimums for the county all factor into the plan before anything is ordered. Getting this right at the framing stage avoids expensive changes once walls are closed in.
What to Check Before You Sign Off on Any Window Install
- Is there a dedicated sill pan flashing at every opening, not just sealant at the bottom?
- Does the WRB integration follow proper shingle-lap order — sides before top, top overlapping sides?
- Are fasteners and flashing metal rated for coastal/salt-air exposure?
- Is the interior air seal separate from the exterior drainage plane, not one sealant bead doing both jobs?
- Are headers and framing sized to the actual window openings, confirmed against the structural plan?
- Does the installer document flashing steps with photos before siding covers the work?
That last point matters more than people expect. Once siding goes on, the flashing work is invisible. A contractor who documents it as they go gives you a record to point to if a problem ever surfaces — and gives us a record to stand behind our own work.
Our Process for Columbia Projects
We start with a walkthrough of the plans or the open framing, confirm rough opening sizes against the window schedule, and flag any structural or sequencing issues before ordering. Installation follows the layered flashing sequence described above on every opening, with no shortcuts based on "it's just a small window" — small openings leak the same way big ones do. We coordinate directly with siding and trim so the drainage plane is continuous from the window flashing out through the cladding, which is where a lot of installations quietly fail when different trades aren't talking to each other.
Because we work regularly in Columbia and the surrounding Bellingham area, we already know how this specific stretch of coastline behaves — which elevations take the worst wind-driven rain, how much salt exposure to plan for near the water, and how long the wet season really runs here. That's not something a crew coming from outside the region tends to have dialed in on day one.
Maintenance After Installation
A correctly installed new-construction window needs relatively little upkeep, but the coastal climate still calls for a basic annual check:
| Task | Why It Matters Here |
|---|---|
| Inspect exterior caulk lines | Salt air and UV exposure break down sealant faster than in drier climates |
| Clear weep holes and sill tracks | Moss and organic debris build up quickly during the wet season and block drainage |
| Check hardware operation | Corrosion risk near the bay is higher than inland — catch stiff or sticking hardware early |
| Look for interior staining below sills | An early sign of a flashing issue, best caught before it spreads into framing |
Get a Free, No-Pressure Estimate
If you're planning a new build or a remodel in Columbia and want windows installed the way this climate actually demands, we're glad to walk the plans or the open framing with you and put together a straightforward estimate — no pressure, no obligation.